Quickstart Guide
Introduction
Welcome to the Nagami Quickstart Guide. This document walks you through the initial setup process to get your Nagami board up and running as quickly as possible. It is written with developers in mind, but should also be approachable for hobbyists who are comfortable working with embedded hardware and serial consoles.
By following this guide, you will install the Nagami System-on-Module (SoM) onto a carrier board, flash a demo image to the onboard eMMC, and boot into a working system.
Prerequisites
Before you begin, make sure you have the following:
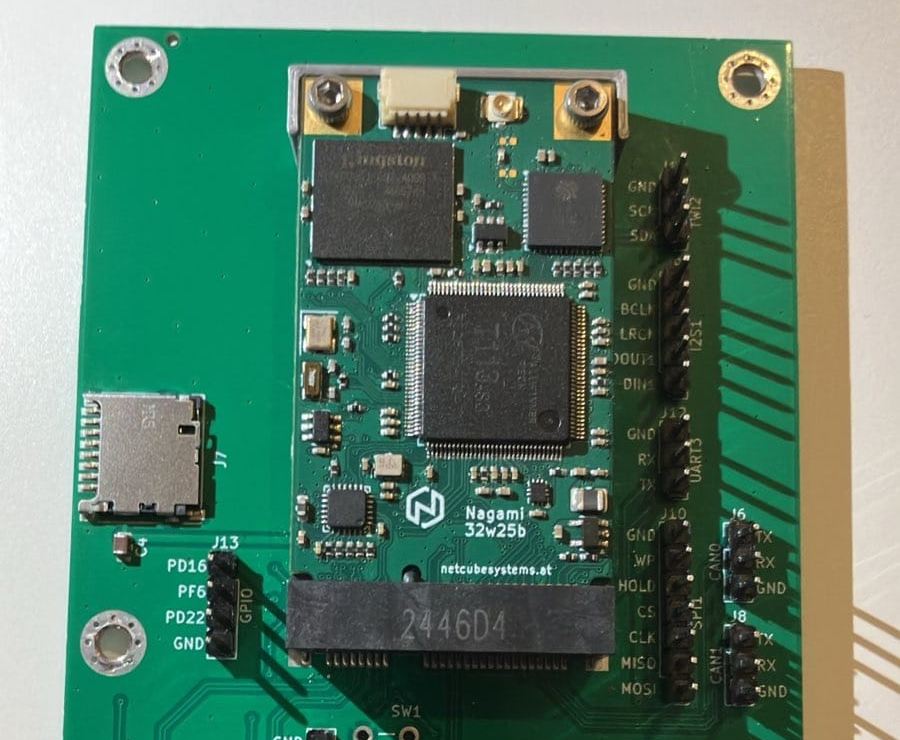
- Nagami System-on-Module (SoM)
- Carrier board for Nagami
(this guide uses the Nagami Basic Carrier) - USB flash drive, 8 GB or larger
- USB cable or suitable power supply for the carrier board
- USB serial adapter (⚠️ 3.3 V TTL required)
Step 1: Install the Module into the Carrier Board
- Install two M2.5 standoffs onto the carrier board.
- Carefully insert the Nagami SoM into the card-edge connector.
- Secure the module to the standoffs using two M2.5 screws.
Step 2: Prepare the USB Flash Drive
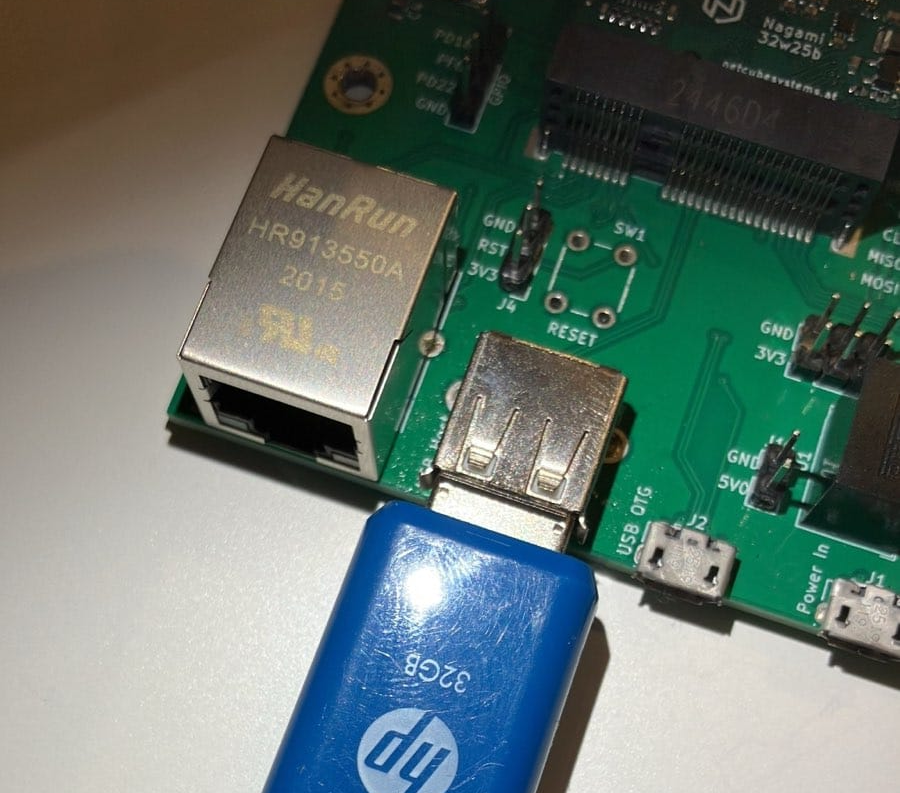
- Insert the USB flash drive into your computer.
- Create a single FAT32 partition on the drive.
- Only the first partition matters.
- No special flags or bootable settings are required.
- Download the latest example image from:
https://dl.netcubesystems.at/products/nagami/software/ - Copy the following files to the root of the USB drive:
install.scru-boot-sunxi-with-spl.binemmc.img- Safely eject the drive and insert it into the USB host port on the carrier board.
Step 3: Connect the Serial Adapter
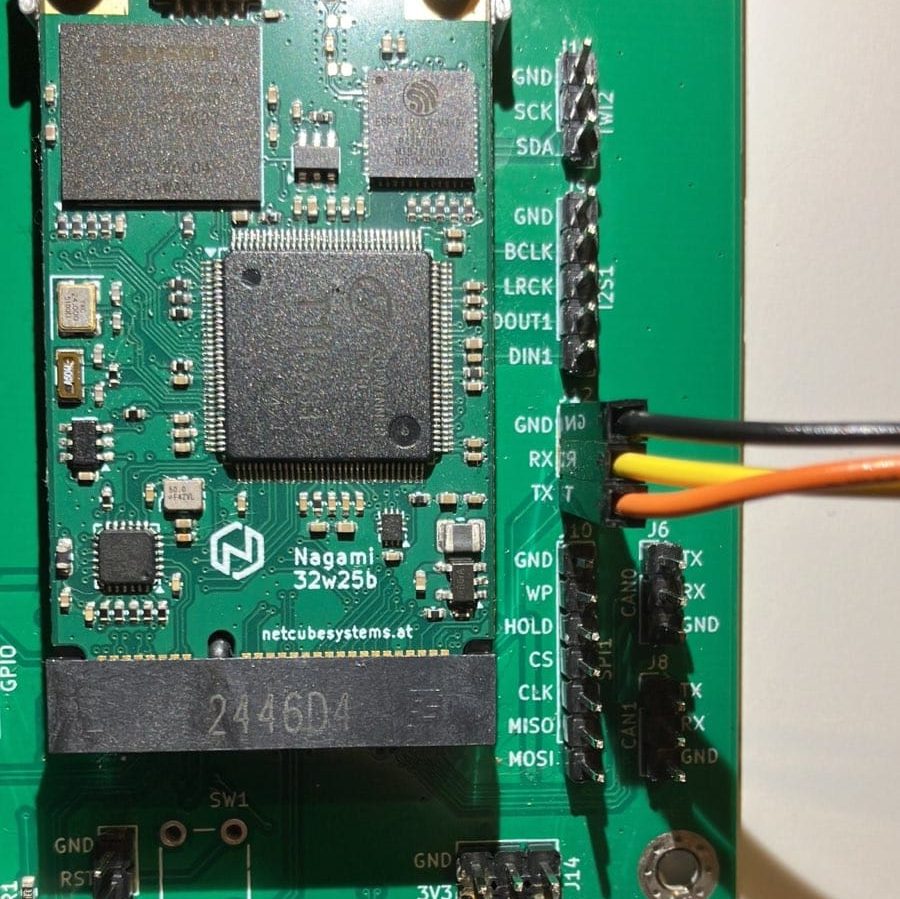
- Connect the GND, RX, and TX lines of your USB serial adapter to header J12 on the carrier board.
- The pin functions are labeled directly next to the connector on the PCB (see image).
- Plug the USB side of the adapter into your computer.
⚠️ Important:
- A 3.3 V TTL serial adapter is required.
- Using a 5 V serial adapter will very likely damage the board.
Step 4: Open a Serial Terminal
- Open a serial terminal application on your computer
(for example: PuTTY, GtkTerm, minicom, or screen). -
Select the newly detected serial port and configure it with the following settings:
-
Baud rate: 115200
- Data bits: 8
- Parity: None
- Stop bits: 1
- Flow control: None
Step 5: Connect the Power Supply
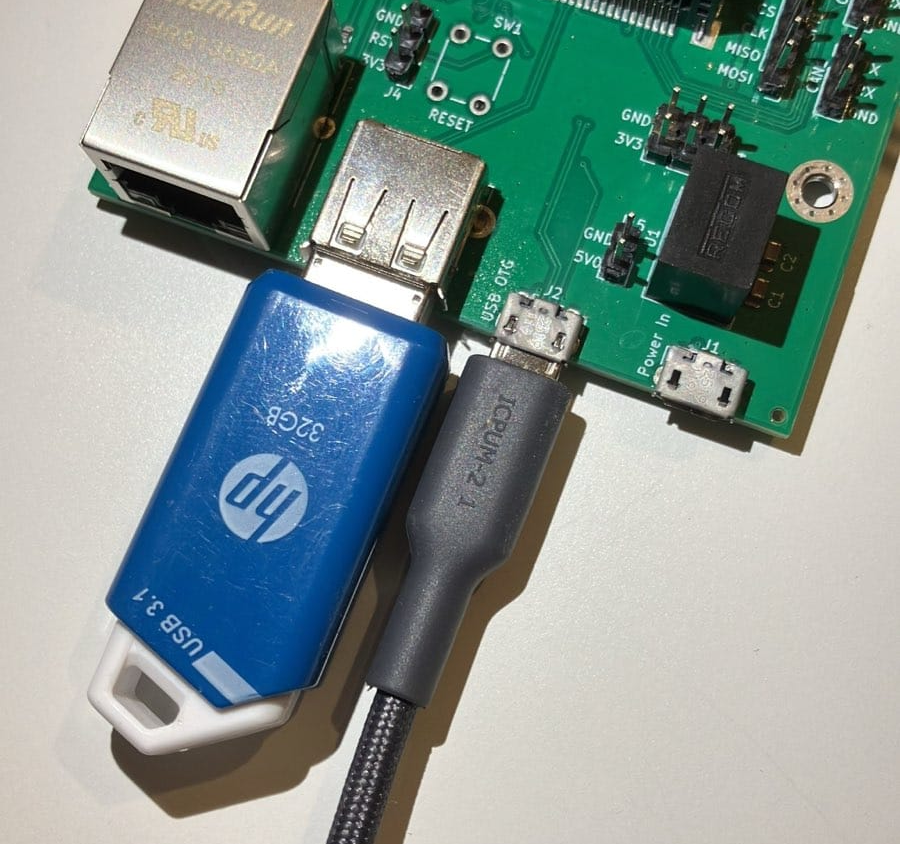
- Power the carrier board by connecting a USB cable to either:
- the USB-OTG connector, or
- the dedicated USB-Power connector.
Power notes:
- Recommended: 5 V / 2 A
- Minimum: 5 V / 500 mA
(sufficient to boot and flash, but with little margin)
Step 6: Boot and Flash the Nagami Board
- Watch the serial console output as the board powers up.
- The U-Boot bootloader will:
- Detect the USB flash drive
- Load
install.scr - Flash the new bootloader and
emmc.imgto the module’s eMMC - After flashing completes, the system will automatically reboot.
- The board will then boot from the freshly programmed eMMC.
- When prompted, log in using:
- Username:
root - Password: (none)
About the Demo Image
- The provided image is a Buildroot-based demo image.
- It is intended for evaluation, development, and experimentation.
- It is not production-ready.
- Default login is
rootwith no password. - If you do not trust prebuilt images, build it yourself.
Re-Flashing and Recovery Notes
install.scrinstalls a new bootloader onto the eMMC.- The newly installed bootloader will not automatically rerun
install.scron subsequent boots. - Leaving the USB stick inserted after installation is harmless.
Recovery scenarios: - If the eMMC contents are broken but the bootloader still works: - Boot from another medium (USB, SD, etc.) and reflash. - If both the eMMC and bootloader are broken: - A recovery U-Boot can be loaded via the SD card interface.
Conclusion
You have successfully set up your Nagami system and flashed a working demo image. From here, you can start developing applications, customizing the Buildroot configuration, or integrating Nagami into your own hardware and software projects.
Refer to the following documentation sections for advanced usage, system customization, and development workflows.